Unit 28 Hair & Makeup Application
- Amy Lennox

- Mar 30, 2022
- 11 min read
Updated: Apr 8, 2022
Theatrical Ageing
this image is cropped as i had only done half of Hanna’s face (left side) as the right side was done as an example by our lecture.

When it comes to theatrical ageing everything needs to be exaggerated so that the features are highly visible to the eye, this is because the makeup needs to be seen from both the front row and the back row of the theatre so everyone can see the features which highlight the character.
To do this you will need to use harsh highlights and contour on the face. To make this as realistic as possible have a look at the slight wrinkles that are already on the face and follow them, to get these features to stand out more get the model to scrunch their face to map out where these are. once you have applied the contour get a very light highlight and apply around the contour to make it stand out more as the colours will contrast each other.
When doing this technique you don’t want to overly blend out the lines otherwise it will look “blurred” and wont have the same effect. You need the contouring to be bold and heavy to give the illusion of sunken face, which causes the wrinkles to appear. i had given hannah red bags under her eyes to make them look puffy as they do in older age, this also makes the eyes look more sunken and smaller.

Upon reflection I would have made adjustments to this look such as blending out the contour slightly more, I hadn’t blended it much as i felt i would have overly blended however it would have been more realistic if i had done so, i also should have done something more with the hair to make this look complete.
Versus Latex ageing
latex ageing is another form of creating an aged face with a more realistic end result as the latex looks like the skin. There are pros and cons to this look such as the somewhat flawless end result however this is a messy process and is also very time consuming. for a Theatre production this technique would have to be done hours before the show begins as you have to apply the latex and then wait for it to dry out completely before you start to add more layers, depending on how much you want to age the characters depends on how man layers you will add, roughly you would need to add around 4/5 layers. this time consuming approach to the look doesn’t include the time you will also need to colour the pierce to give more depth and character.
to achieve this look you will need to get your model to puff out their cheeks and stay still as the latex is drying, this is so the skin is stretched so when the latex is dry and they relax their face will give the illusion of wrinkles where they latex has compressed, this will need to be done a few times to receive a more vast result. for the forehead wrinkles you will need to do the opposite and get the model to screw up their face so the latex will dry onto their natural wrinkle lines, this applies to anywhere else on the face that may have any natural wrinkles such as the "smile lines" on the side of the eye or the wrinkles on the chin however for these areas you will not have to do as many layers of latex as the skin is thinner and will just appear too thick and will not have the same effect.
To give this piece its final touches you will want to do some light colouring on the facial features to help them stand out, i say light colouring because you don't want to over exaggerate the features and make your piece Unrealistic, to do this you will need to take a light contouring shade and go in between the wrinkles to give them more depth. for the places that you haven't latex'ed such as under the eyes and the brows you want to add colour so it completes your look. for the brows we used a coll under toned creme foundation and brushed it through the brows thoroughly and brushed them in an upward motion to give them a bushy effect. Then for underneath the eyes we added a red/brown tone colour to add more depth underneath my eyes.

In conclusion i think this look went really well i feel it was very realistic, some hair and costume would have gone really well to complete the look, for the hair I would have put them in rollers to give them a 60s curl.
Gelatin Burns
for my gelatine burn piece I decided to go with an acidic burn piece this is classified as a 4th degree burn, meaning the burn can destroy all layers of skin down to the bone and muscle. i wanted to give the illusion that the burn had gone down the the veins in the arm. The downside to working with gelatine is that is does dry very quickly so you do have to work with the product fast, because of this i feel like the work can somewhat be rushed and not be as accurate as you may want it to be, also the product does move alot so doesn’t completely stay in place until it is dry. i started this piece by colouring my arm first i used a mixture of red and purple alcohol paints so it applies thin and was buildable. I then put the gelatine in the microwave for 10 sec so it would melt but not be too hot to apply to the skin, when you do take it out of the microwave you should use heatproof gloves as the container will be hot. I had only applied this is certain areas of my arm as burns are never 100% in one area. once i had applied this and it had set i then coloured in between the gaps to give the illusion of veins.

to improve this look I would go further along my arm rather than into one patch.
Wig Styling
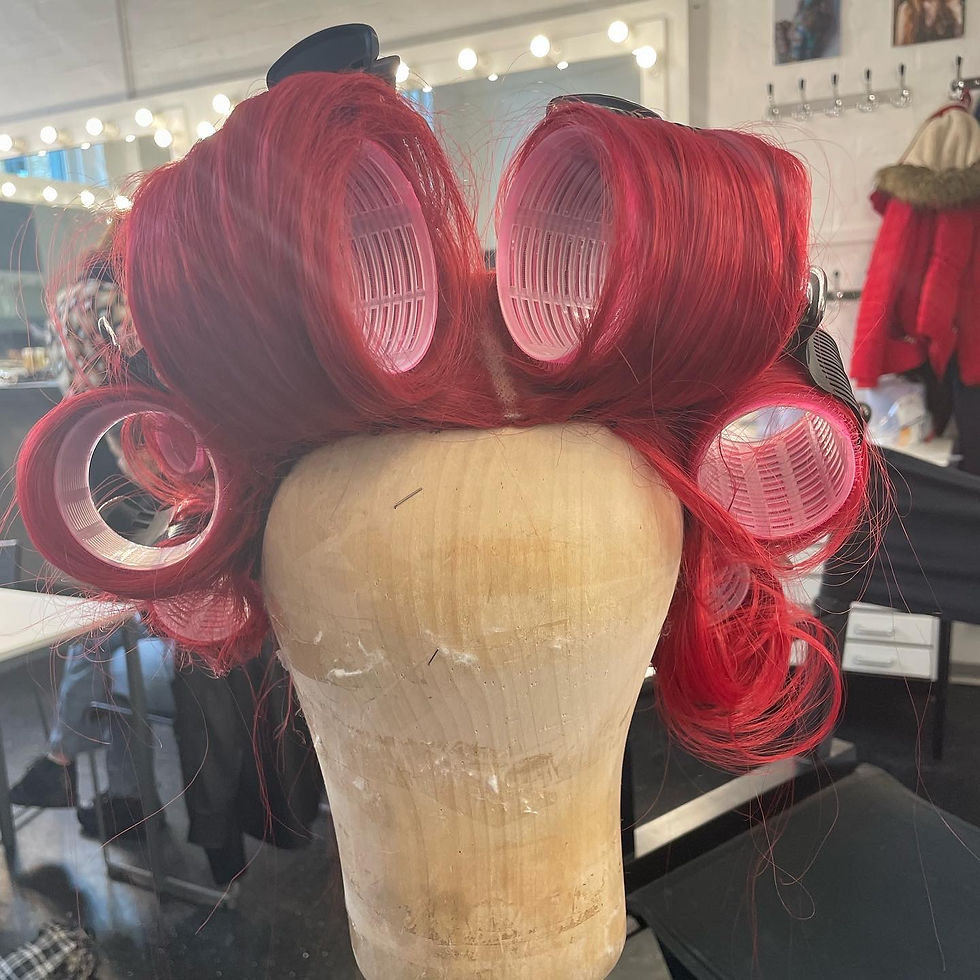
i tried to style this synthetic wig with rollers to give it a beach wave look. as this is a synthetic wig i made the hair damp before hand so the hair would dry in the rollers, i had done this to give myself the best results possible.

I started by sectioning the hair in 3 layers and rolling the hair into the rollers in an upward motion, i used the hair clips to keep the rollers in place. With the front sections of the hair i rolled them away from the face so when the rollers are out it will shape the face and you will still be able to see the look.
Unfortunately the rollers did not work and the hair was flat. if i was to do this look again i would use a curling wand on the hair and use pins to put them in place.
wax work
when working with wax it can some be hard as it doesn’t stick to the skin on its own. To get this product to stay down you should use an adhesive, i had used the prosthetic adhesive, apply lightly to the area your about to use and wait until the glue is tacky before applying your wax otherwise it will not stick. You want to apply a thin layer of wax and blend the edges into the skin, i use petroleum jelly as I feel it smoothes out better and stops the product gets stuck to your sculpting tool. Use the end of a sculpting tool to get the cuts as thin and realistic as possible, i was trying to achieve a scratched look. To fill in the gaps i used a dark purple cream paint to give more depth then filled the “cuts” with the “runny blood” by Mehron. For a final touch i noticed that i could see the veins in the arm so i had followed it along onto the wax so it blended into the skin.

overall im very pleased with how this had turned out. sculpt gel work
i decided to do an open wound piece with sculpt gel. I personally struggle work with sculpt gel as i feel it is very temperamental as you have to get the right consistency of the mixtures. to create the gel you need to mix equal parts A & B and then add as much of part C as you would like depending on the consistency you would like your gel to be. You apply your sculpt gel straight onto the skin and also blend out the edges into the skin i also use petroleum jelly for this as i feel the gel sticks to itself and falls apart. I applied this fairly thick on the arm and cut in the middle of it, i then used some cream red paints to colour the insides and Finished it off with some fake blood.

to improve this I would have not made the wound so risen. blocking out brows
To block out my brows i used the Got2BeGlued gel, i brushed this through my brows to make sure the product was completely in them, once i had done this i brushed them in an upward motion. as the glue was starting to get tacky i used my fingers and pressed down on the brows to get them as flat as possible.

as my eyebrows are dark i had to go over them with a red concealer to cancel out the colour. Once i had blended it out i used a loose translucent powder to set the colour. I then had gone over my brows with a cream concealer which had cancelled out the colour of my brows, however when it all dried my brows had risen above the product and stuck out.

If i were to do this again i would try a different product to stick them down with, and press down on the brows till they are dry to keep them flat.
Drag practice
for my first drag practice I decided to go with a bold eyeshadow look, i had got my inspiration from the judas tape face charts. i started with the outer colours using a purple shadow and blended it out with a light pink then a yellow shade. I then used some makeup remover to create the shape of the cut crease, i then used a white concealer to sharpen the shape and create a base. For the blue wing i used a blue shadow and used an angled brush to get the shape as sharp as possible.
I used a warm toned liquid foundation for the base of my face. To bronze my face i used a cream foundation stick as i feel it blends well with the foundation. as drag queens have alot of contrast between their “contour” and highlights i used a light concealer stick directly underneath the bronze cheeks and underneath the eyes. As a final touch i applied a red wig.

To improve this look I would make a few changes such as blocking out the brows, adding some lashes and styling the wig.
Drag practice

to improve from my last drag look i had began by blocking out my brows. This did not work as well as i hoped that it would, because of this i had used my eyebrows as a guid line as to where i was going to place my eyeshadow.
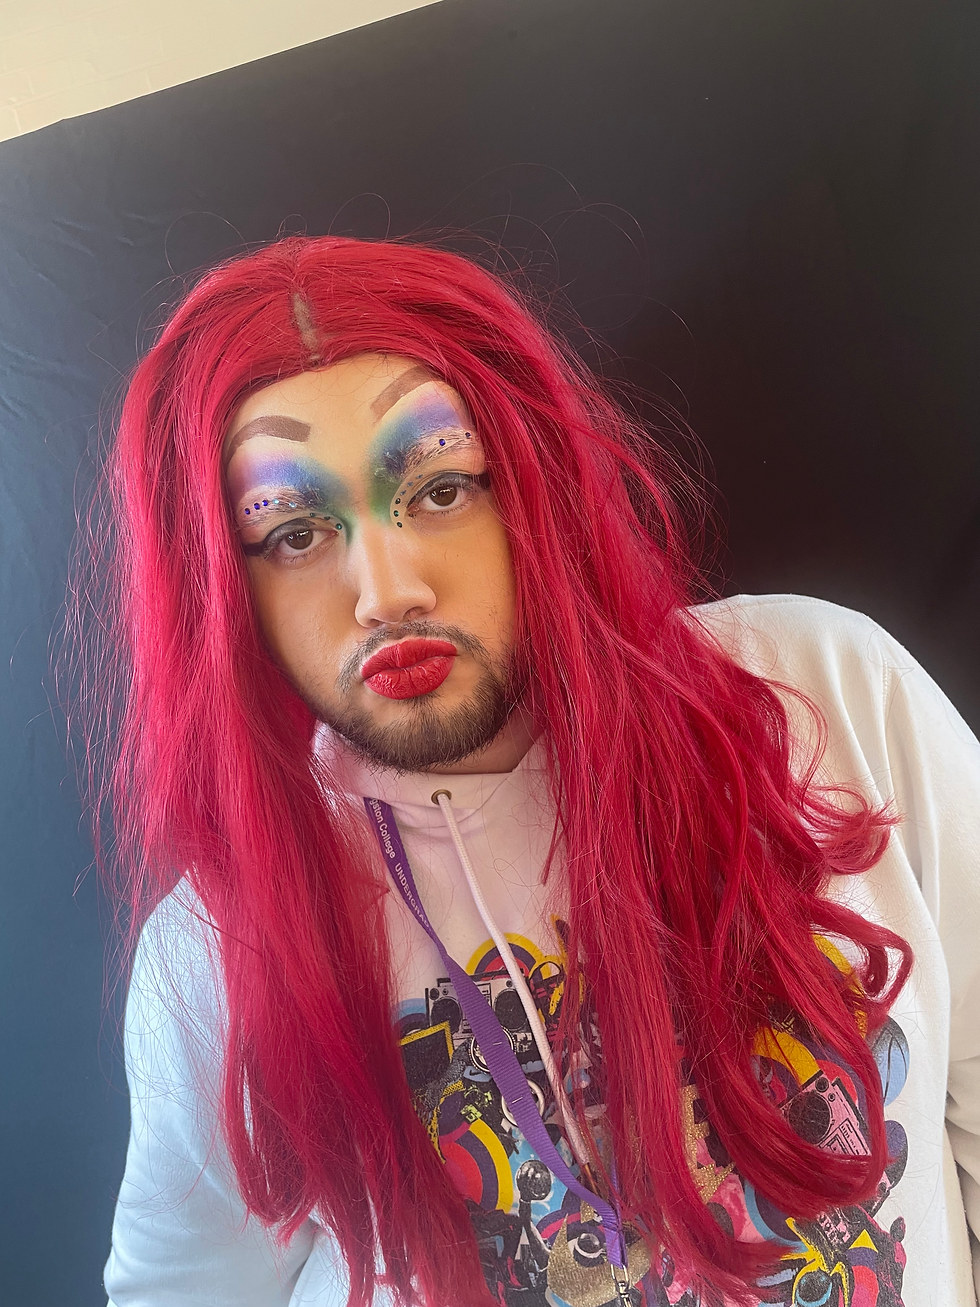
i decided to go with a rainbow pattern in the shadow, which was inspired by another judas tape face chart. i packed on the colours using a flat brush and eyeshadow, to get the colours to blend together i had used a fluffy brush and had spent time brushing in between the colours. once i had completed this i had created a cut crease using makeup remover then going over the lines with a cream concealer for the base. To matt the lid i used a nude shadow.
I had used multicolour gems on the eyes that had already had an ahdesive on the back of them, i had used tweezers to apply them neatly as they were small. For the shimmer on the lid i had applied some thick multi colour glitters. To apply these i had placed some prosthetic adhesive on the lid and waiting for it to get tack and patter the glitter on with a flat pack brush.
for the base i used a warm toned liquid foundation for the base of my face, To bronze my face i used a cream foundation stick. as drag queens have alot of contrast between their “contour” and highlights i used a light concealer stick directly underneath the bronze cheeks and underneath the eyes. for the lips i began with a red lip liner and had over lined and drew out the lip shape i wanted for this look, once i had done this i used a liquid matt red lipstick. For final touches i had styled my wig in a half tied up ponytail.

Overall im very happy with how this drag look turned out, on final practice I would probably use less glitter on the eyelids and maybe add some bottom lashes.
Drag final
my drag character was based on Ms Haylock who plays Jamie's art teacher. because i had chosen this character i had made this look to be as artistic and colourful as possible to show her vibrant personality.

For my drag final i took most of my inspiration from my last drag practice look that i had done. I began this process by sticking down ezra‘s eyebrows down with a Got2BeGlued gel, i found this slightly difficult to do as they have thick coarse brow hairs. Once i had glued them down i used a red concealer over the brows to colour correct them so it is less visible to the eye, i used a loose translucent powder over them to set the colour. Once i had done this i used a light cream concealer over the brows to blend the brows into the eyelid as best as i could. I had then drawn on some fake brows using a brown pomade, I realise this was a mistake to make this my next step rather than the eyeshadow as i had a set placement for the shadow to go rather than putting it where it fits best on the face. i had tried to add some stray hairs to the brows to make them look more realistic however it just completely melted into the pomade so it did not have the desired effect.
Because i had pre placed the brows on the face i was then having to fill the gap between the “brow” and the eyelid so i was unable to use the shadows as a crease over the real brow like i had previously done in my practice. I had not done this as the shadow would have been too thick and looked overly dramatic and not appealing. as a compromise to this i had stuck the gems over the brow to give it slight coverage, from the distance of the performer and the audience the focus would be on the shimmering of the gems and not the real brow. From my practice i had stuck glitter onto the lid however in my final i had decided to do a winged eyeliner as I didn’t want the sparkles to be overbearing and tacky. Ezra has hooded eyelids so I should have done the eyelid thicker on the lid so that it was more visible. I also was going to apply some dramatic lashes to the top and bottom lashes complete the eye look however i didn’t have the appropriate eyelash glue to stick them with.

For the base i used a liquid foundation, ezra has an olive skin tone so i had used a warmer shade to avoid white washing them. white washing is a term used to describe the after effects of someone’s using makeup that is too light for the skin, causing then to look grey/ washed out and slightly ill. As you can see ezra has facial hair that rises fairly high on the sides of the face, so i contoured directly above the facial hair which was on the cheekbone, this worked in my favour as the higher contour lifted the face. i had then set the face with a loose translucent powder for longevity wear. i had decided to use a bright red lipstick to compliment the colour of the wig, i wanted to over line the lips for the dramatic effect however because ezra has facial hair i was unable to do so. to improve on the wig I should have braided the hair under the wig cap then pre styled the wig.


Comments