Sweeney Todd
- Amy Lennox

- Mar 14, 2022
- 10 min read
Sweeney Todd is a live action musical written in 1979, inspired by the 1973 play of the same name by Christopher Bond; that was then written to be the book Sweeney Todd: The Demon Barber of Fleet Street. The character Sweeney Todd himself was originated in The String of Pearls, a penny dreadful by an unknown author which was written between the years of 1946/47. The musical had then been open to Broadway by 1979 and is now a movie directed by Tim Burton in 2007.
sweeney Todd is referred to as a live action musical as it it displayed in various ways, for example it is both a theatrical production as well as a movie.
Despite the fact that they are all based around one story they are all portrayed differently in a multitude of ways ranging from their acting to their costumes and makeup.
THEATRE PRODUCTIONS
when it comes to a theatre show the most important rule for a makeup artist is that the makeup should be visible from both the front row and the back row. This is achievable by making sure that your looks are very bold and dramatic, if you do this correctly the audience will be able to recognise the charecters before they introduce themselves. The budget of the production will determine the products used on set, if it is a low budget production there will be less detailed and unrealistic pieces. In this case its likey that they will use lower end products such as scar wax;
Scar wax is an good product to use as it is very easily manipulated and when blended it looks like skin. This can be a cheap product to buy, and is also so simple that it can also be made from home in a few easy steps. This product is placed directly onto the skin so it is not a time consuming. It is not necessary to use an adhesive but for longevity and stronger hold you can use things like spirit gum.
Spirit gum is a liquid adhesive with multi-use For things such as wigs, hair and beards. This product is mainly made of alcohol and needs to be removed with its specific spirit gum removed which is an oil based product.
coloured cream paints
Cream paints can be bought widely on any budget and are perfect for theatre, this is because they are highly pigmented and very thick. They are an oil based product and are best removed with an oil based remover.
stage blood
stage blood is a fake liquid blood used for cuts and wounds, and in our case, slit throat wounds. You can either buy a cheaper fake blood or make it yourself with a couple of products. fake bloods come in all different shades depending on the type of blood it is wether that be coagulated blood, squirt blood or blood spray. A stage blood is a bright red as its meant to look “fresh”. However, for a higher budget production they will have different products that will give a better sense of realism to the show. they will also use alot of props that will help with the sfx. For example they may use bleeding knives and blood bags to create the bleeding illusion.
for the makeup side there will be products such as reusable pre-made prosthetic pieces.
It is important to have pre made reusable prosthetic pieces on a set as it is more time efficient. silicone prosthetic pieces take a while to make as there are many steps to it, having one already there will give you the best results with the time you have. To make these pieces as realistic as possible it’s likely that they will be coloured with alcohol based paints;
These paints are great for a multitude of things for example prosthetic pieces and straight onto the skin. This is because the paint is very light which means its easily buildable As this is an alcohol activated pallet it needs IPA;
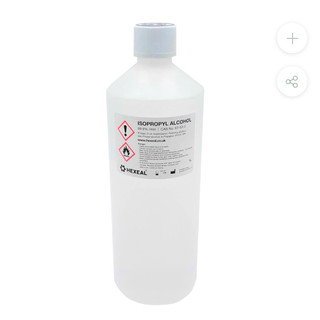
Isopropyl alcohol also known as IPA is used to activate the alcohol paints. it is crucial that a 99% and above is used otherwise it will be insufficient.
MOVIE PRODUCTIONS
movie productions are very different from Theatre productions as they have a much larger budget to work with and more technical and experienced artist to work with. Movies also have the benefit of the “movie magic” as they can use cgi, green screens and perfect lighting on set. In sweeney Todds budget they had;
4 prosthetic makeup artists
4 key prosthetic makeup artists
9 hair stylists
13 makeup artists
2 prosthetic coordinators
so i think its fair to say that it had a budget bigger than any higher budget Theatre production.
“https://plosiontube.com/2021/03/31/sweeney-todd-the-demon-barber-of-fleet-street-2007/”
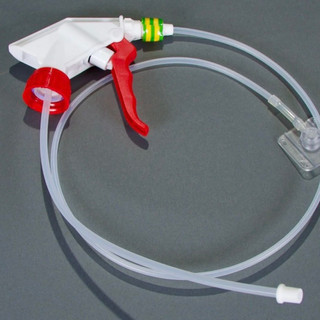
Because of this bigger budget the movie can use higher end products such as artery pumps.
artery pumps are good for special effects on screen as they pump blood out of a “wound” as its being created so theres no delay in reaction. This is vital as it creates the illusion that it is real as it will squirt out as much blood as needed and theres no limitation.
Risk assessment for a live production


Face charts
SWEENEY TODD ( Benjamin Barker)

For Sweeney todds face chart i have given him a pale off-white skin tone as this is a gothic like musical where they are all ghost-like/ half dead looking, to give this illusion i would use a grey liquid primer and build on it with a darker grey for the contour to sculpt this face to look more hollow and slim and set it with a loose translucent powder so the makeup stays under hot stage lighting. And then use a red shadow that has purple undertones for under the eyes to give that tired/ aged eyes. And lastly would use a pale skin tone lip using a cream pallet.
ADOLFO PIRELLI ( Daniel O’Higgins )

Adolfo’s character in Sweeney todd is ver theatrical and extravagant so it makes him perfect for theatre as you can exaggerate his makeup and costume as it fits his characteristics.
Foradolfo’s base i would just use stage makeup to cover up any blemishe, an slight liquid blush on the cheeks to give him a slight vibrancy. For his facial hair I would use a thin eyebrow pencil and dab it onto the skin for some light stubble then for the moustache you could either sew a moustache and stick it on flat, or indi stick on faux hair.
for the slit throat I would use a pre made prosthetic piece and could use a blood bag to create the blood or a prop knife which squirt blood.
MRS LOVETT

For mrs lovett‘s character i have also given her a grey off-white skin tome with some slightly darker grey contour lined from her checkbones to her jaw to give her face a hollow look i have also given her grey smokey eye to give to giver her a sunken eye effect for ageing and red undertones to make her look tired. overall she has an aged and dull look.
Slit throat preparation
in preparation for our final assessment, we had to start with the basics to build up our skill level, we began with smaller cuts. we began this process by sculpting out our cuts with two different types of clay. On the left i have used your typical NSP sulphur free plasticine modelling clay, this clay comes in a range of toughness being soft medium and hard. I have used medium as i feel that it is a nice in between of the both as it can be manipulated but also wont move unless i put pressure onto it. On the right i have used monster clay which is a sulphur free oil based elasticated clay in medium. We had used both so we can feel the difference between the two and decide which is best to use for ourselves, personally i still prefer nsp clay as it blends smoother.
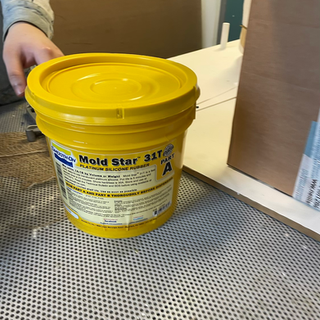
to create the cuts i had rolled out the clay onto the flat surface and then began to smooth out the edges. This is vital as it will make your prosthetic piece “melt” so to speak, into your skin, I then used my sculpting tools to create a thin but deep cut. next you have to build two walls around your piece, this is in prep for your silecone mould and prosthetic piece. To create my silicone piece i had to mix parts a+b using mouldstar to create the textur, you measure these out 1:1 so its an equal ratio, however you mesure these in separate cups and mix a pigment colour into one. You do this so when you mix the both together you can see if you have completely mixed them together. once you have put both together you have to mix them straight away as you have limited time before they cure and is no longer useable.
once you have made your mixture pour it into your moulds and wait for it to set, once you have done this pull your moulds out and tidy them up.
To create your prosthetic piece you need to paint a mixture of cat plastic and ipa together, the ratio is optional as you can make it as thick or as thin as you wish. You will want to build this up in layers usually 3.
once the cat plastic has dried you then need to mix equal parts 1:1:1 silicone gel a : silicone gel b : deadner, again you will keep them separate and mix them as soon as they’re together as they also cure. For this part you will want to put a skin tone pigment into one cup so it isn’t completely clear and is buildable with colour. make sure you only use a small amount of pigment so its buildable and not a flat colour. once this is completed pour into your silicone mould and use wooden spatulas to takeaway any access and is flat and level with the mould.
Once it has dried, you need to powder down both sides of your prosthetic piece as it will stop it from sticking to itself and folding. once you have done this you will need to apply the adhe of your choice, i used my prosthetic adhesive and applied a thin layer on the outside and thicker in the middle where the prosthetic piece was so it stays sturdy. You need to wait for the glue to turn transparent so it is tacky and will stick first time. once completed use ipa to go around the edges and make it blend into your skin. after this use your alcohol activated paints to colour the outside of the “skin” and your desired paints to colour the inner “wound”
i blended the edges well however could improv on colour matching with the skin and making my piece more flat.
SLIT THROAT
i began this process by having a look at the different kinds of slit throats for inspiration and decided that i wanted mine to look like a hanging throat with the fat and muscle. i had carved out the size of my piece and created a hole in the middle shallow. I had done this so i was able to fit the clay pieces in the middle. I had done this by taking very small pieces of clay and balling them and rolling them out to fit the placement i had wanted.
i then used more clay to build my two walls around it so I could make my mould.
inspiration photos
When i made my mould i had realised some of the mould had gone underneath the finer details so i was un able to see them, however i cleaned up my mould and cut the top layer so i was able to see the details and get the results that i wanted.
I had then moved onto making my silicone piece. Once i had peeled this out i had realised that i may have put more pigment in than necessary so I would be un able to build on the skin tone when i colour the piece, however I decided i would use this piece for my practice application. I also noticed how there were slight rips within my piece however this is okay because it was around the edge of my piece which needed to be removed so it could be smoothened out.
practice application
( video of my application)
when applying this piece on my brother i had a few complication, for example my brother has adhd so he struggled to stay still and concentrate when i was applying as this was a long process, however when you work in the industry this isn’t uncommon amongst models so you need clientele care. I made sure we took breaks in between and made sure he was as comfortable as he could be in this process so it would go as smoothly as possible.
2nd prosthetic piece for final
For my final I decided to play it safe and make a backup piece in case something goes wrong with my other pieces, and luckily i did as my other pieces has completely ripped. I was surprised to find that my piece had no rips whatsoever and was the perfect buildable colour, this is because i had added an extra thicker layer of cat plastic and less pigment.
i began with Harley’s face makeup. I had chosen the beggar lady simply because in terms of look her character has more depth. Lucy barker was the beggar lady and was raped by judge turpin, and because of this she poisoned herself in an failed attempt of suicide which then lead to her to insanity and onto the streets being homeless and full of disease. Because of her backstory i was able to create a clear image of what i wanted her to look like. I began with the eyes, i wanted them to have s very tired dull and sunken look so i used a purple liquid primer on the inner corner and edge to give me a base. I then used a purple ey and packed it on to make the colour more pigmented and deep. For underneath the eyes i used a mixture of reds and purple to give a somewhat bruised illusion as she is highly lacking in nutrients and vitamins it is common that bruising under eye can happen. I then used a light pink/red tone on her smile lines to give a sore rash look. i tried to “dirty down” her face by using a stiple sponge and a dark brown/black cream paint however i feel this was not visible enough to the naked eye and should have gone more dramatic with this as it needs to be seen to both the front of the crowd and back. I lastly tried to stick on some sculpting wax to give her facial warts however some did fall off in the duration, these were also hard to blend into the skin as it was a pre coloured wax. onto the slit throat, i had used the prosthetic adhesive onto the piece and also onto her neck to guarantee that the piece would stick and stay in place. i waited for the glue to go from white to translucent so i knew it was tacky enough to apply. i then began to remove the edge if the piece using ipa and a cotton bud, I continued to do this to remove the edge of the piece so that it would “ melt into the skin”. to colour the piece i used my alcohol activated paints and a brush and flicked on the skin tone colour. it is important to do this and not to brush it on so you can build on the colour and not overly apply straight away. Once i had done this I started to apply colour to the middle of my piece by using a yellow for the circles to show that its fat and then coloured the lines blue as they are veins. I then begun to flicker on my red paint until i was satisfied with the coverage. Just before the photo was taken we added the dripping blood so it was freshly done.

COSHH


Comments